In this blog, we are going to explore how to deploy nginx to Kubernetes using a Deployment file, Service file, and Ingress file. These files are essential components of any Kubernetes application deployment, and they work together to ensure that your application is available and accessible to your users.
We will start by creating a Deployment file that specifies the desired state of our nginx deployment, including the container image to use, the number of replicas to create, and any necessary environment variables. Next, we will create a Service file that exposes our nginx deployment to other pods within our Kubernetes cluster, allowing them to communicate with each other. Finally, we will create an Ingress file that defines the rules for routing incoming traffic to our nginx deployment based on the host and path of the incoming request.
Once we have created these files, we will use kubectl to deploy our nginx application to our Kubernetes cluster. We will also use ngrok to create a secure tunnel to our Kubernetes cluster, allowing us to preview our application in a live environment.
By the end of this blog, you will have a solid understanding of how to deploy and manage applications on Kubernetes using these essential components, as well as how to preview your application in a live environment using ngrok.
Before you begin
This tutorial assumes that you are using minikube and docker to run a local Kubernetes cluster. Visit Install tools to learn how to install minikube.
You need to have a Kubernetes cluster, and the kubectl command-line tool must be configured to communicate with your cluster. It is recommended to run this tutorial on a cluster with at least two nodes that are not acting as control plane hosts. If you do not already have a cluster, you can create one by using minikube or you can use one of these Kubernetes playgrounds:
minikube start
minikube is local Kubernetes, focusing on making it easy to learn and develop for Kubernetes.
All you need is Docker (or similarly compatible) container or a Virtual Machine environment, and Kubernetes is a single command away: minikube start
What you’ll need
2 CPUs or more
2GB of free memory
20GB of free disk space
Internet connection
Container or virtual machine manager, such as: Docker, QEMU, Hyperkit, Hyper-V, KVM, Parallels, Podman, VirtualBox, or VMware Fusion/Workstation
Command for minikube
New-Item -Path 'c:\' -Name 'minikube' -ItemType Directory -Force
Invoke-WebRequest -OutFile 'c:\minikube\minikube.exe' -Uri 'https://github.com/kubernetes/minikube/releases/latest/download/minikube-windows-amd64.exe' -UseBasicParsing
Start your cluster
Interact with your cluster
First kubectl install, then you can now use it to access your shiny new cluster:
kubectl get pods
Alternatively, minikube can download the appropriate version of kubectl and you should be able to use it like this:
Deploy applications
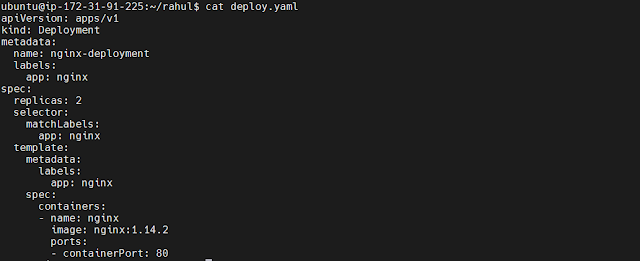
Deployment YAML: A Deployment YAML file is used to define a Kubernetes Deployment. Deployments are used to manage the creation and scaling of replicas of your application, and ensure that they are available and updated in a consistent way. In a Deployment YAML file, you can specify the container image, the number of replicas to create, and various other configuration options. Here's an example of what a simple Deployment YAML file might look like:
Now run this command
kubectl apply -f deploy.yaml
Created container for Deployment file
Service YAML:
A Service YAML file is used to define a Kubernetes Service. Services provide a stable IP address and DNS name for accessing a set of Pods, even as the Pods come and go. In a Service YAML file, you can specify the type of Service (ClusterIP, NodePort, or LoadBalancer), the port(s) to expose, and the selector to use for determining which Pods to route traffic to. Here's an example of what a simple Service YAML file might look like:
Now run this command
kubectl apply -f service.yaml
Ingress YAML:
An Ingress YAML file is used to define a Kubernetes Ingress. Ingresses provide a way to route external traffic to Services within your cluster. In an Ingress YAML file, you can specify the rules for how traffic should be routed based on the host or path of the incoming request. Here's an example of what a simple Ingress YAML file might look like:
Now run this command
kubectl apply -f ingress.yaml
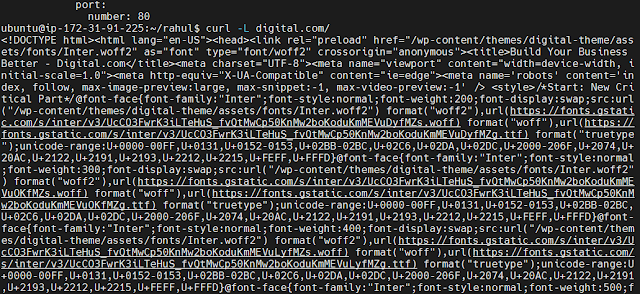
Now need to check IP on same Instance check by following command.
curl -L "ip of service"
Now everything is fine there. So its time to show our running application to Developer, which is very important
Also Read: Guide: Deploying WordPress using IAM Role, RDS, Docker, ECS, and pushing it to ECR
Setup and create on ngrok
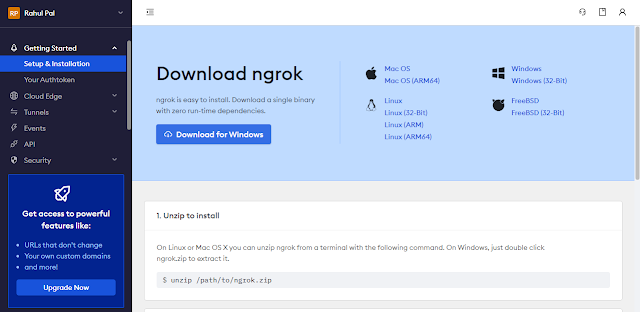
Now setup setup ngrok by instruction given by official website.
Collect Ip of our cluster
minikube service my-service –url
Run this command for ip mapping to ngrock
ngrok http http://192.168.49.2:30007
Boom! Our project is now live on Kubernetes and accessible to our users.
In conclusion,
Deploying nginx to Kubernetes using a Deployment file, Service file, and Ingress file is a straightforward process that can be accomplished with just a few commands using kubectl. These files work together to ensure that your application is available and accessible to your users, while also providing the flexibility to scale and manage your application as your needs change.
Additionally, by using ngrok to create a secure tunnel to your Kubernetes cluster, you can preview your application in a live environment, making it easier to test and troubleshoot any issues that may arise.
Overall, Kubernetes provides a powerful platform for deploying and managing your applications, and by following the steps outlined in this blog, you can quickly and easily deploy your own applications to Kubernetes and take advantage of all the benefits that this platform has to offer.
.png)


